CLICK HERE FOR FREE BLOGGER TEMPLATES, LINK BUTTONS AND MORE! »

Monday, October 3, 2011

Fall Tree Art

Here is a super easy art project that is the perfect decoration for the fall season!  Fall trees!


All you need is 12 x 18 light blue paper, brown paper for the trunk (I drew a trunk and copied it for students to cut), a half sheet of 9 x 12 green paper, saran wrap, and green, yellow, orange, red, & brown tempera paint.

Have the students cut out (longways) a curvy line for grass.  Glue to the bottom of the blue paper.  Then have them cut out the trunk and glue.  Then call them back to a separate table to squirt a little bit of all the paint colors above the trunk.  Then set a piece of saran wrap on top and have the kids smear it around.  Make sure to touch the trunk.  Take the saran wrap off and let dry.  Viola.  A simple, yet decorative, fall tree!


Sunday, September 18, 2011

Welcome Bags

Every year, I make welcome bags for my students that go along with my classroom theme.  This year, since I have a rockstar theme, I made rockstar welcome bags.  Inside are some goodies for the students.  The bags make the students feel so special on the first day,


Here they are for you to use:


I think I originally got the idea for these on Amanda Madden's second grade website.  And I know they are a little late for the beginning of the year, but feel free to save to your Google Docs or pin to Pinterest to use next year!

Saturday, August 27, 2011

Friday Freebie!!

Every Monday morning, the kids get to write in their weekly journal.  Sometimes I have them write about what they did over the weekend, or I give them a prompt to write about.  Since we have a "Rockstar" theme in our class this year, I used a rockstar type font.  Here is the journal we use:


And here are the covers for the other months:


Hopefully you can use this in your classroom!  Enjoy!


Friday, August 26, 2011

Clearly...I'm a "Teacher Week" slacker! But I'm making up for it now! :)

Ok, so I haven't posted since Monday, and that means I missed Teacher Talk Tuesday & Where It All Goes Down Wednesday.  But, I'm making up for my missing posts now!  So here it goes...


Teacher Talk Tuesday 

For all you new teachers out there:
Make sure to communicate with your parents.  I think that's all parents really want...is to be in the loop as to what is going on while their children are at school.  Make a weekly newsletter, create a class website, send home a weekly behavior note, etc.  Whenever you communicate info without parents having to ask, the less stressful your school year will be.

Get as much as you can ready over the summer.  Trust me, I LOVE my summer vacation!  But I spend a lot of it preparing for the upcoming school year.  With two kids at home, I can't get to school as early as I'd like or stay as late as I'd like, so I make up for it by doing a lot over the summer.

Be organized!  It takes a lot of initial effort to be organized, but you will thank yourself later.  I have a huge file cabinet, and in it, I keep a file folder for every unit or chapter that I teach.  I keep the master copies, projects, project examples, & rubrics inside (only the things I'm actually going to use).  Then, during the school year, when it comes time for that unit, I make all the copies at once and store them in my literature organizer.  That way I have everything ready for the entire unit, and I'm not spending all my prep time at the copy machine.

And lastly, but most importantly, remember that you do have a life outside of school!  Take time for yourself and enjoy it outside of your classroom once in a while. :)


Where It All Goes Down Wednesday

Here is a peek at my classroom for 2011 - 2012...


Three For Thursday
 
My Favorite Font


My Favorite Blog
 
I love SO many blogs, but I really enjoy this one:
 

My Favorite Online Resource (most definitely)


Forgive me for posting pretty much everything in one night, but my first week back at school has made me so exhausted!!  And now it's time to get some shut-eye!  Adios blogging buddies!

Monday, August 22, 2011

Meet the Teacher Monday

Me, Jonathan, Jacie, TJ


Tell us a little something about you...

I am a wife to my wonderful husband, TJ.  We'll be married for 10 years in October!  We have two great kids, Jonathan and Jacie.  Jonathan just started second grade and Jacie, kindergarten.  I've only been blogging since this past summer, although I've had a class website since 2003.  I love technology and enjoy every opportunity I get to search for ideas for my classroom.  I also love sharing, thus the reason I started this blog.


How long have you been teaching?

This is my eighth year teaching, and it's my eighth year teaching second grade.  Actually, it should've been my ninth, but I took a year off to stay home with my kids.  I taught in Oswego, IL for 4 years, but then took a job in Ottawa, IL to be closer to home with the fam and all.  I seriously just love teaching second grade.  I could probably teach first or third, but my heart lies with second graders.  It's like a transition year, and I love helping the kids make that transition.


You might not know...

I love snowmobiling!!  It's one of my absolute favorite things to do.  We usually make the trek up to the UP Michigan 3 or 4 times a year.  I love racing through the trails and trying to keep up with my husband and and my dad! I'm actually pretty good at it! ;)


What are you looking most forward to this school year?

I always love meeting my new class each year.  Every summer I get this giant burst of energy to try and find new ideas and activities to try in my classroom.  With Pinterest and all these awesome teacher blogs I've been following, I have found so many new things that I can't wait to try! 


What do you need to improve?

I wish that I could implement the Daily 5 and CAFE.  But, in my district, we use Harcourt Storytown.  The past couple of years, however, I have incorporated it somewhat, because I do a lot of the read-to-self strategies.  I honestly wish that I could implement the entire program, but at this point, it's out of my hands.


What teaching supplies can you not live without?

My literature organizer.  I swear, I could NOT live without this.  It keeps me SO organized.  I can copy things way in advance, and I can always find what I'm looking for.  It's the best system I ever started using in my classroom!  I actually have two of them!


I used to always use masking tape to attach posters and stuff to my classroom walls.  That is, until I found Stikki Clips!  I love them!  They are so easy to use and reuse.  They literally last forever.  And my posters NEVER fall off the walls anymore. 


I know this seems a little old school, but I still love me some Print Shop.  I'm a pro and have been since high school, lol.  I use it to make my weekly newsletter as well as signs and posters for my classroom.  Love it!


And last, but not least, I couldn't live without my Mr. Sketch markers.  The fat ones are nice and bold for my anchor charts.  But, I love the skinny ones too.  I use them when grading daily work and tests.  I also like going around and putting smelly stars and smileys on my kids' papers.  And they love getting smelly stars drawn on their hands once in a while too.  It's a great incentive and doesn't cost a thing!


Saturday, August 20, 2011

Time for Blog Hoppin'

Stop on over at Blog Hoppin' to participate in Teacher Week 2011 and join a brand new blog!

TeacherWeek


Thursday, August 18, 2011

Math Game Labels {an addition to my previous post}

I can't believe I forgot to include the files for the math game labels in my last post.  So, here they are!  Today was my first day of school, and it was a great day!  I'm so excited for the new year!


Tuesday, August 16, 2011

Math Games Galore

Ever wonder what to do with the kids who always finish early??  Well, during math time, my students get to play math games.  When they finish their independent work, I look over their papers to check for understanding.  When I know they've got it, I assign them a partner, and they play math games.  The partner group chooses the game they would like to play for the remainder of math time.  The kids enjoy playing math games.  It really is an incentive that makes them work hard and use their time wisely.

I use a pocket chart that has 10 slots (I think it was originally made to hold cd's).  Each slot has a label on the front, a card with the directions, and a baggy with the materials inside.  Each baggy is labeled with the game name as well.  With this organization, the kids can quickly choose a game and return it to the correct spot.

 
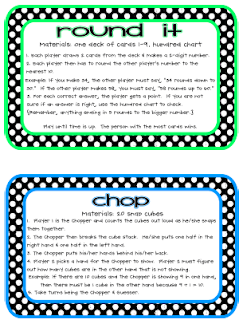
Click on the pictures below to view/save the game directions.  You will need basic math manipulatives like dice, counters, unifix cubes, and so on to get started.  I always demonstrate how to play all the games at the beginning of the year.


   Here are the cards that I use, too.  I like them because they have "counters" right on the cards for your concrete learners.  You will have to print or copy lots of these to make full decks for each game.  Notice that some games only need 0-9 cards (like Two-Digit Big Man) and some will use the 10 card.  I wrote the game name on the back of each card (yes, very tedious work).  But, it keeps the games more organized it the end. 


And that's it!  Now your students have something fun (and educational...even though they don't realize it) to do when they're finished with math! 

Monday, July 25, 2011

Literacy Work Stations / Centers FREEBIE

If you are looking to implement literacy work stations / centers in your classroom this year, look no further!  Below, you will find everything you need to start.   

This will be my second year using these work stations. Originally, I got the idea from Amanda Madden's Second Grade Website.  I tweaked them quite a bit and even added some of my own.  They are a wonderful learning tool for my students, and they really enjoy this time of the day.  At my school, we use the Harcourt Storytown reading series.  I created these work stations as a way to teach the skills in the series in a fun, engaging way.


I try to use the work stations everyday.  The students work on a station for 15 minutes.  Then usually, we switch and do another station for another 15 minutes.  Below is the work station chart and schedule that I use {Click to download for free in Google Docs}.  I assign students to a station based on where they sit...for example, since my students sit in groups, they share a station with the person sitting next to or across from them {students 1 & 2 on the schedule, etc.}.  I assign them ahead of time.


 When I tell them it's time for stations, they get their first assigned basket and bring it back to their seat.  Inside the basket are the directions and all the materials needed to complete that activity.  Here are the basket labels and instruction cards.

Click to download in Google docs.


Now, obviously {as you can see from the instruction cards}, you're going to need some basic materials beforehand...like baskets.  I bought these Sterilite ones from Target.  Any baskets will do though.  The following are the items you will need for each station:

Adventures in Vocabulary  
  • Task Cards {I found these on Karen McDavid's Website...these are great!  I start out with a few easy ones and add more as we learn the skills.}
  • Copy of vocabulary words {Mine are located in a pocket chart on my focus wall each week}
  • Handwriting Paper
  • Slates & dry erase markers

Handwriting Heroes
  • Handwriting paper {1st Semester, they print the letters & 2nd semester, they get to write the letters in cursive after they are each introduced}
  • Vocab Words & Spelling Words {Mine are located on my focus wall}
  • Slates & dry erase markers

Jump Into Writing 
  • Monthly Task Cards {I found these on Ms. Winston's Website...wonderful! I change them out every month.}
  • Sentence cards {Paper with scrambled sentences, laminated.  Students use a dry erase marker to unscramble and write the sentences correctly.  You will have to create these.}
  • Handwriting Paper
Listening Center
  • At least 2 portable CD players
  • Cd's with the weekly stories on them.  Enough CD's for the number of players you have.  {I put each theme's stories on a new CD. It makes it easier for the kids to find the correct track.}
  • Reading Response Cards {From Ms. Winston's site again.  :) I use sets 1, 2, 3, & 4.}
Nonfiction News

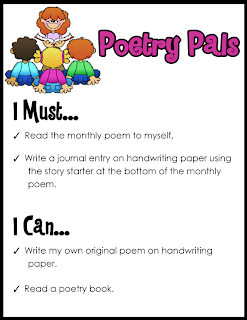
Poetry Pals
  • Monthly Poems {From Ms. Winston's Website, yet again}
  • Poetry books
Post-Office Center
  • Individual index cards with student addresses printed on each
  • Handwriting paper
  • Slates & dry erase markers
Reading Comprehension
  • Picture Books {I let the kids choose a just right book from my leveled class library.
  • Book Report Task Cards {I feel horrible that I don't remember where I got these.  I know it was at a very dedicated teacher's website.  If anyone knows where I got these, please let me know! Also, I chose a handful of cards that my students can understand.  You can add/change cards as the year goes on.}
  • Computer to take AR Test
Reference Round-Up

Word Detective  
  • Word Detective Task Cards {From Karen McDavid's site again}
  •  Magnifying Glasses {Cheap plastic ones from the dollar store will do}
  • Handwriting paper
  • Slates & dry erase markers
  • Word work cards {I have write on/wipe off cards in my classroom that work on word families, etc.  You will have to make these or find on your own.} 
  •  
     
    Voila!!  It's a lot of printing, cutting, & laminating, but that's it!  It is totally worth it to have organized literacy work stations in your classroom.  Enjoy!!!